Quick Start
This section explains the procedures you should follow to recover deleted data.
If your digital device (Digital Camera, Audio Recorder, etc.) is not recognised as a logical drive under Windows, then you will need to use a Card Reader. Plug a Card Reader to your computer as described in the manufacturer's description and install the included drivers if needed. You can then directly access the device memory with this program and reconstruct the data.
During recovery you will be guided through 9 simple steps:
Step 1 of 9: Select drive letter
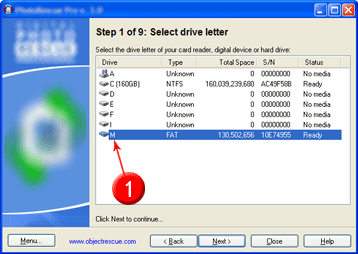
Select a drive letter of your PC Hard Drive, Card Reader or Digital Device.
Step 2 of 9: Select file types you need to recover
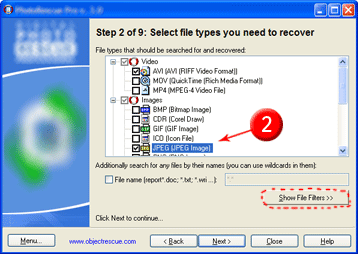
Select the file types you need to recover.
It's strongly recommended to
uncheck all other file types which you don't need to be searched and recovered!
Additionaly you can search for any files by their names and you can use wildcards in them.
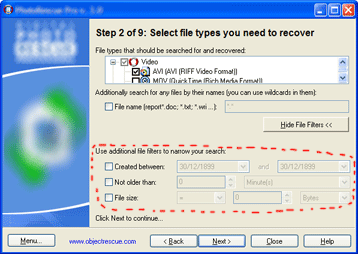
Click Show File Filters to narrow your search using additional filters:
Step 3 of 9: Undelete or recover corrupted files
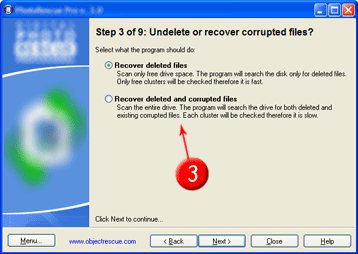
Select what the program should do. If you select the second option - even existing corrupted files will be searched and recovered.
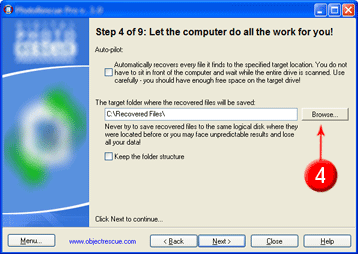
Step 4 of 9: Let the computer do all the work for you!
Destination folder is the folder where recovered files should be placed. You
can type folder name or click Browse to select an existing folder.
Step 5 of 9: Scanning the file system...
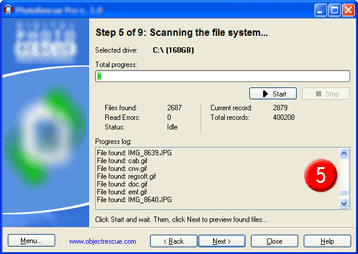
On this step the program scans file systems to search for files you selected.
Step 6 of 9: View and recover files after file system scan
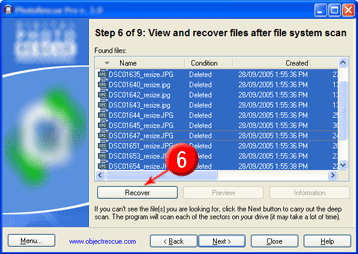
Here you can preview and recover found files. *
If you can't see the file(s) you are looking for, click the Next button to carry out the deep scan. The program will scan each of the sectors on your drive (it may take a lot of time, depending on drive size).
Step 7 of 9: Scanning the drive sectors...
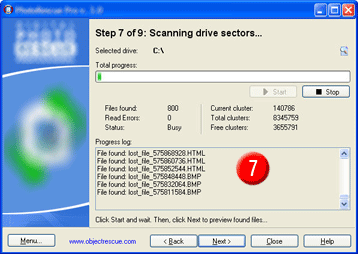
On this step the program scans whole or free drive spaces to search for known data sequences.
Step 8 of 9: View and recover files after file system scan

Here you can preview and recover found files. *
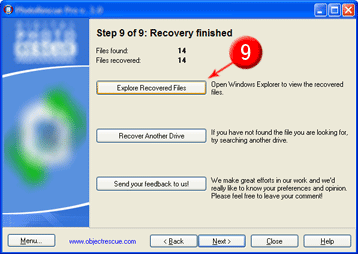
Step 9 of 9: Finish
The final step. Now you can see all recovered files by pressing 'Open Windows Explorer'.
 Screenshot Screenshot
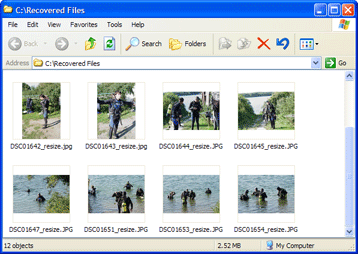
View recovered files in Windows Explorer:
Note: The trial copy does not support the recovery
function, but only previews file contents and shows the amount of the retrievable information. To use program without this limitation you MUST register.
THAT'S ALL.
Above we have described the most basic features
to get you started. Please
read the documentation to learn more about the powerful features of the program and discover how you can customize it to suit your preferences!
See also:
Purchasing Information
Frequently Asked Questions (FAQ's)
Copyright © 2000-2006 Regall LLC dba essentialdatatools.com.
All rights reserved.
|